
Getting work ready for assessment and what to submit
Debbie Johnston is following the Creative Arts Degree and recently submitted Level 5, Graphic Design 2: Working with a Client, work for assessment.
Debbie’s website https://globalnomad.design.blog/ and her Assessment Presentation document were particularly well laid out. As soon as the assessment starts this helps the assessors to get an instant and positive ‘feel’ about Debbie’s body of work.
Let’s start with Debbie’s website.
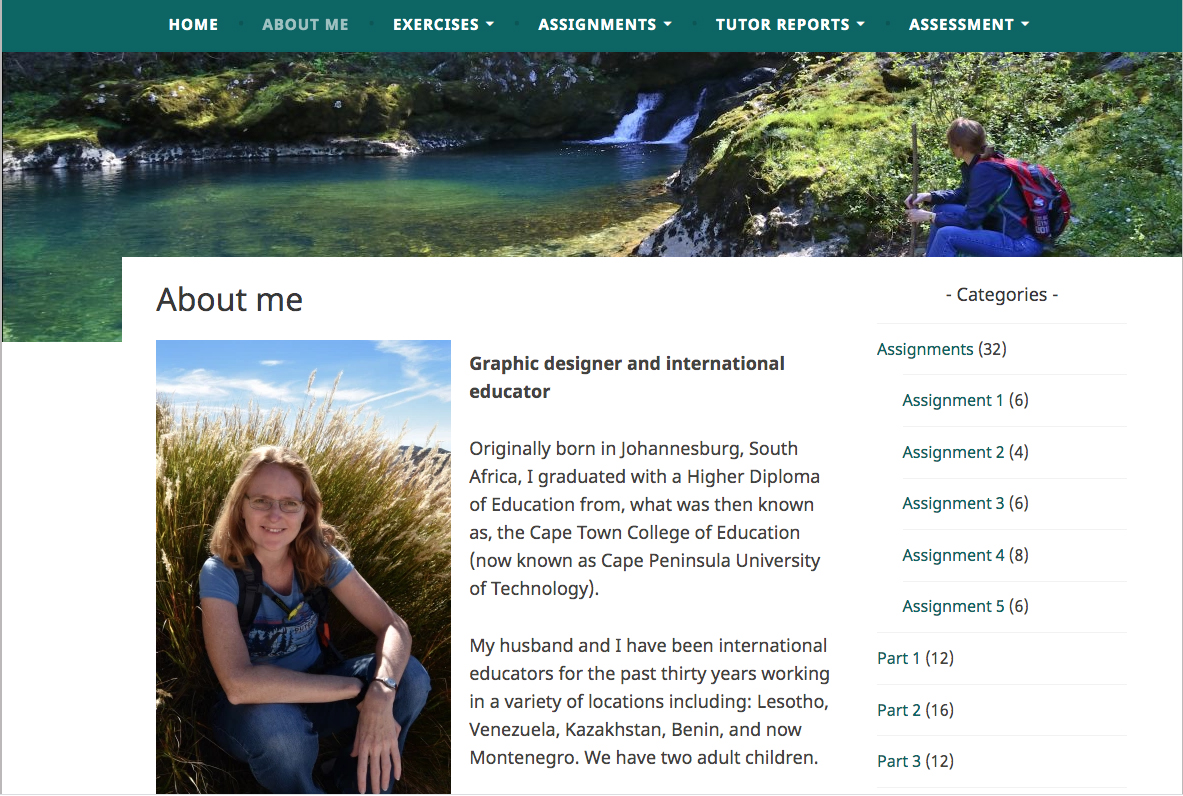
Not only does Debbie have all the general areas such as Home, About Me, Exercises and Assignments she also has two additional and very useful sections – Tutor Reports and Assessment.
In the Tutor Reports area https://globalnomad.design.blog/category/tutor-reports/ she has shown how she has responded to selected pieces of tutor feedback for each Assignment. This is through explanatory text, extra research and sometimes additional development of her work. This shows an analytical approach to tutor feedback and not just general agreement, or disagreement. Debbie has understood the positively-critical nature of the feedback and the role of the tutor in providing this.
In the Assessment area https://globalnomad.design.blog/reflection/ Debbie has shown an holistic and systematic approach via an assessment submission mind-map. She has divided this up into the general assessment criteria headings to help her search for appropriate visual and written evidence within her body of work. If you look on the link you can see that she has added in specific exercises and assignments as her examples.

Debbie has then created her selection of learning log entries from this research. This learning log assessment criteria table makes everything super clear for the assessors and also shows that Debbie fully understands the assessment criteria. It also highlights to Debbie which sections of her website might need an extra ‘tweak’.
Now on to Debbie’s Assessment Presentation document.
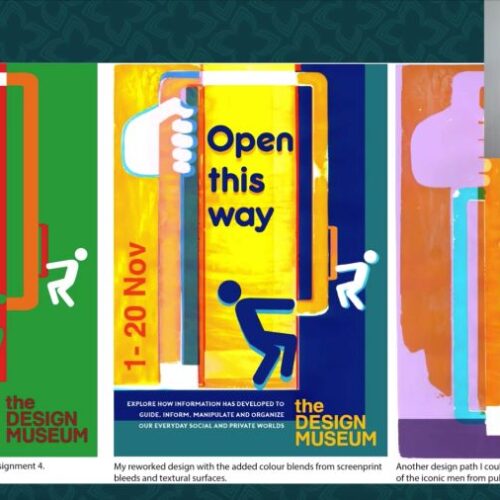
Debbie’s document has helped to show how she has developed her work throughout the course and, in particular, in response to tutor feedback. This can be viewed alongside her digital portfolio to reveal more information about her changes and visual developments.
Debbie has shown specific examples of how work has been altered and also considers issues such as copyright. These examples also show how some of the work has explored a more experimental approach with, for example, the use of screen printing.
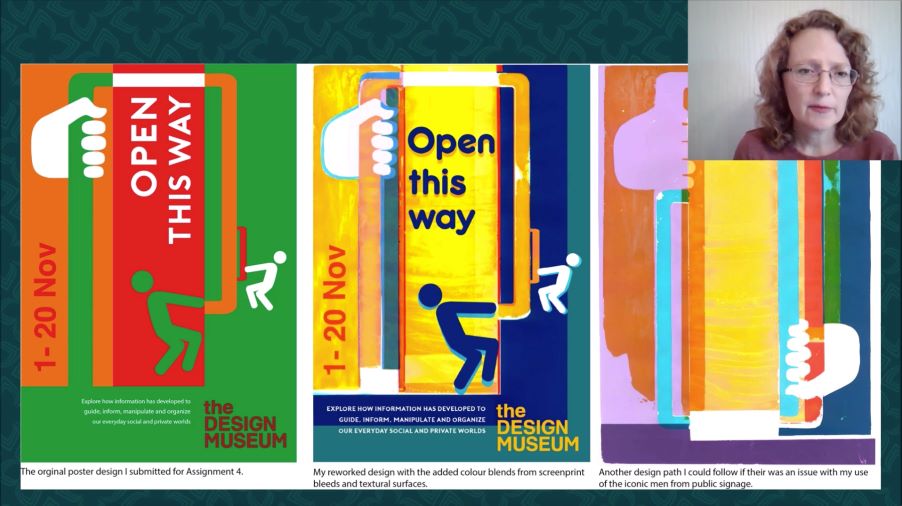
Accompanying the images she has inset a video of herself explaining her design process. This is a key element to her presentation as it takes us through some of her visual decision making. Debbie is also able to fully express which elements she has particularly enjoyed.

Finally, here are some comments from Debbie about how she organised her work for assessment
Q: How long did you set aside to sort out your work for assessment and was it enough?
I initially had thought that within a month I would have everything sorted out ready for submission. When I say “a month” – as I work full time as a teacher – this would normally mean about fourteen hours a week for roughly four weeks. However, as I found it hard to get my head around what I needed to do and I had to figure out how to create my presentation video, as well as what format to use to best present my Assessment Portfolio, I must admit that I had periods where it seemed like I was just wheel spinning. So, in the end, it took me a lot longer than I had anticipated. For me the biggest challenge was trying to create a ‘video’. However, once I discovered the ability to create an explanatory video using PowerPoint for my Assessment Presentation, I was able to become far more focused. This presentation took roughly two full days from the commencement of the design in PowerPoint to the final edits. Most of the slides had a few takes to get the commentary to flow naturally and to get the time down to the required length.
Q: What advice do you have for other students who might be getting their work ready for assessment?
My advice is to try to work with tools that are not going to add stress to what can already be a stressful task. When I started out, I felt that the expectation was to create an accomplished video and I even tried to learn a different platform, Screencast-O-Matic, in order to create something slick. Now for people used to this platform, I think it is ideal; but as it was yet another new tool for me, it was starting to give me additional stress. Fortunately, while trying to learn how to use Screencast-O-Matic, I stumbled across a tutorial showing how to annotate a PowerPoint presentation with recorded narration. As I already know PowerPoint, I felt like this was a workable solution for me.
Q: Please can you explain, in technical terms, how you set up your Assessment Presentation document. In particular, how did you include the inset video and voice over?
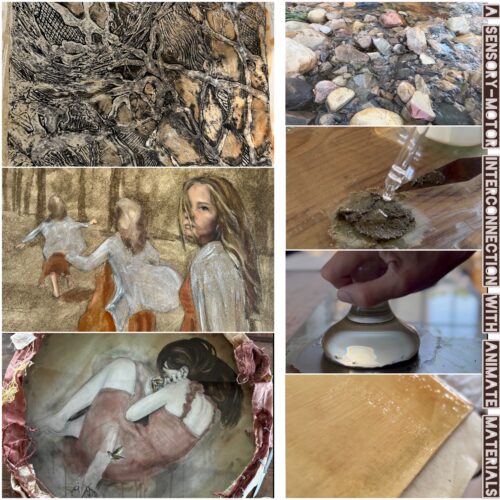
Firstly, when creating my Assessment Presentation, I decided that it would be beneficial to fine tune my selection that I had already created for my Assessment Portfolio down to just two projects, with an additional project that shows something of my personality – my Pastiche project. By narrowing my choices, allowed me to share more about my thought processes and progression through each project. Each of my projects were selected because they showed personal growth and a marked development in the designs from the initial concepts to the finished designs.
Once I had my projects selected, I then went about creating my own PowerPoint backgrounds so that they replicated the same branding that I used in my Portfolio. With the Cover and Final slides, I planned on having a larger rectangular insert for my video, to enable those watching the presentation to feel as if they had met me, prior to my image becoming reduced to a tiny rectangle in the corner. On each slide, I made sure that the slide was balanced with space allocated for my tiny video insert. To improve uniformity, I had my rectangle appear in exactly the same position on each slide – except the first and last slides.
Before doing voice-overs, I typed up what I wanted to say for each slide. When you click Slide Show/ Record Slide Show there is a place where you can insert the text you will use as a prompt. I must admit that although I did all of this preparatory work, I ended up finding it a lot easier to just remind myself as to what I wanted to say with each slide, and then try to talk more spontaneously. Trying to follow my script exactly made the dialogue too stilted and I ended up having to do too many unnecessary ‘takes’. However, typing up my text first did help me to process what I wanted to say, so it was still a helpful step.
To record a narration, it is actually quite simple, the only thing you need is a camera and microphone. Using a laptop with an inbuilt camera and microphone worked seamlessly. You open to the slide you want to narrate, and click Slide Show/ Record Slide Show. A rectangular window will then pop up with your video feed. Next, all you do is press Record and start speaking. When you are done, you simply press Stop. You can Replay it and Delete it etc., quite easily. Once you have recorded a slide or two, you can check its effectiveness by going back to SlideShow/From Beginning. The slide show will then advance with your narration. One tip I found out was that it is helpful to give a slight pause after the countdown given when you press Record. This slight pause will ensure that when you render the slideshow as a video, your dialogue does not get inadvertently clipped. After taking the recording of each slide, you can click on your video rectangle and drag it to where you want it to appear on the slide. By dragging the corners, you can enlarge or shrink the video window.
Once I had recorded all of my narrations, I then timed the presentation. As my initial presentation was far too long, I had to take out a few slides and redo some of the narrations to shorten the timing of specific slides. What I loved about using PowerPoint to create the presentation was that it was relatively easy to adjust the length of narrations. Instead of having to redo a whole video segment, I could just redo single slides as needed. One tip is to ensure that you have a plain background and wear clothes that you can wear each time you are recording. The plain cream wall background I used meant that you can’t tell that some slides of mine were retaken on different days.
I made sure that I saved my PowerPoint as a .pptx file before rendering it as a video. This meant that I could go back and edit it whenever necessary.
In order to render the PowerPoint presentation as a video, you just select Save As/ MPEG-4 Video (.mp4) file. What I did find annoying was that after rendering my presentation as a video there were slight glitches between the slides as they appeared in my video. I looked this problem up on various online forums and found that this is a normal problem. So, I then opened the video in a video editing program and just removed the tiny glitchy bits between the slides. This is the reason that I said it is helpful to give a slight pause before commencing your narration. This allows the time gap needed to snip out the glitchy bits.
Q: What do you think are the most important things you have learnt about yourself, and / or your design process, whilst you have been studying with the OCA?
I think that the word “endurance” sums up the thing I have learnt the most. When you start studying a course such as this one, you have no idea how many curved balls will be thrown your way during your studies. Unlike attending a university in person, where you are a full-time student and you can focus on your studies, completing your course within three of four years; studying while trying to hold down a full time job – and handling the uncertainties and challenges that Covid has brought these past two years – has required me to push through mental and physical obstacles. At times, studying this way has felt like a marathon. However, despite the many setbacks, I have learnt that it is often in the times when I have felt like I have hit a brick wall and my creativity is depleted, that by just focusing on the next thing and doing it, that the success of doing that one thing helps me to get the gumption to do the next thing…and so on.
Q: Is there is anything you would like to say about working with your tutor and responding to their feedback?
It has taken me a while to get to the point where I feel like I am learning to effectively take on board the feedback I receive from my tutors. I must admit that when I heard that the assessment format has changed and that our tutor is now our primary assessor, it helped me to be far more intentional about revisiting my projects and assignments to see how I could follow their advice to reach far more effective and cohesive designs. I think that this is so beneficial and helps the feedback to become a springboard to a further cycle of development and growth.
Q: Finally, how have you managed to stay focussed on your studies despite the pandemic and working full time?
My friend, the art teacher at our school, is also a practicing Montenegrin artist. One day, when I was bemoaning my lack of time to work on my studies, she said emphatically that I have to just be disciplined and set aside two hours each night and a block of time at the weekend to work on my studies, otherwise I will never find the time to do it. I wish I could say that it was that easy, but I do try to work about 6 hours during the week and then to spend at least 10 hours during the weekend. When I hit a busy period at school, I will then know that I will need to pay back the time by working during parts of long weekends and vacations. In some senses, knowing I will need to pay back the time, helps me to at least put in an hour or two whenever possible. My husband will attest to the fact that I sneak in time to work on projects whenever I can.
I am also deliberate about making sure that I take one day off every week to just allow myself time to rest. This often seems counterintuitive when I have numerous deadlines, but without the rest, I end up wasting precious time because I am exhausted. It is interesting that going for a hike or on a walk – where possible into nature – has the effect of suddenly allowing me to make connections that I had not anticipated. I have often also ended up finding inspiration in the photographs that I bring back from a walk.
The Pandemic has put a whole new meaning to the struggle of working and studying. The tiredness that is brought on by the lack of routine and the constant indecisiveness of unknowns is mentally draining. I must admit that towards the end of December last year and the beginning of January this year, I was thoroughly exhausted. I ended up with days that I had set aside for working on OCA studies, where I could not think creatively to save my life. At times I seriously thought that I would need to quit studying. What was really helpful then was to have people with a design sense, that I could talk things through with. By playing around with their suggestions, helped to unlock ideas to investigate. My encouragement to all of you is “Keep on keeping on”.
 |
2 thoughts on “Getting work ready for assessment and what to submit”
Leave a Reply
> Next Post OCA’s online degree showcase – Live!
< Previous Post Thinking about making and physical objects
OCA MA Fine Art: In conversation with Riette van Rensburg
0 Comments
The OCA MA Fine Art team have been working with their students to undertake...
Read more
Drawing Department 2023 Assessment Showcase
9 Comments
As Programme Leader for the BA (Hons) Drawing Degree I am really pleased to...
Read more
Tutor News – Katrina Whitehead
6 Comments
Some of you will know me as your personal tutor, or you may have...
Read more
Introducing our Interior Design External Examiner, Marianna Velissaropoulou
3 Comments
With assessment events held regularly three times a year, many of you will be...
Read more
This is a great walk through of using powerpoint for a video presentation. I really enjoyed watching Debbie talk about her processes. Thanks, and I’m bookmarking this for my next unit assessment!
Thanks for the comments – hopefully it will help you at assessment time.